
You may have go to run a Income Statement in Business Central or a Balance Sheet and have found the report returns nothing.
That is because you have to build it!
Business Central offers much greater financial reporting and analysis than other accounting systems, however that does mean there is some setup. Or what I like to call creativity.
How to create Financial Reports in Microsoft Business Central.
Navigate to Financial Reports either using the search function or under Finance click Financial Reporting.
On the Financial Reports page – click New and name the report you are creating.
You can also use the Copy Financial Report action if there is a template report you want to use already.
The New creates a totally blank report.
There are some standard templates there to use – note you still have to create the reports even from these ones.
The row and column definitions are set for you with these but are editable.
Choose a row definition.
Choose a Column definition.
Now to create the report its self – Edit the Row Definition, this is the report descriptions and where the financials are being pulled from so for example if you are creating an Income statement/profit and loss you will design this here.
Click Edit Row Definition

It will ask you if you want to create a new one which is a good idea as this will keep the “master” or “template” one that you can always go back to.
This opens up the Row Definition which is a rather large template.
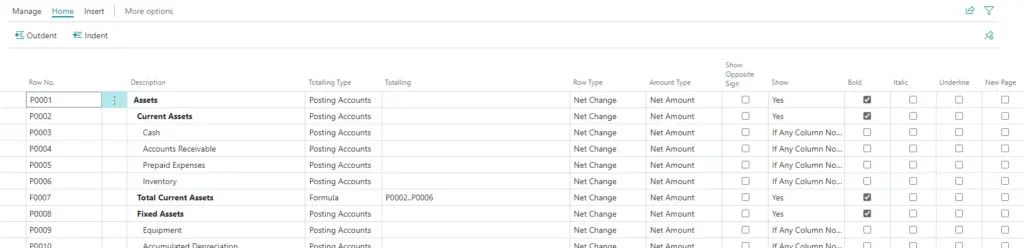
Row No.s
This helps total and calculate the report
Totalling type
This allows you to pick what kind of G/L Account you are using to pick up this data.
It can also be a formula – therefore it allows you to enter a formula using the Row No.s
E.g. Row 6 less Row 5
Would be something like P0006-P0005.
Which you would enter in the totalling field.
Row Type Specifies how the amounts in the row are calculated.
I.e. Net Change, Balance at Date or Balance at the beginning.
Amount Type specifies the entries that are include.
I would default to net change but it could also be debit or credit.
Show Opposite Sign – basically means sales will be show as a positive number on the report even though they are a credit balance in the Trial Balance.
It could also be a statistical account, with creating financial reports in Business Central the range of possibilities is massive.
Show allows you to define if you want to be show on the report.
For example if the G/L Accounts total nil you can define for the row line to not appear.
You can insert and delete rows change the description and make items on the report Bold, Italic, underline or go onto a new page using the tick boxes.
Now we skipped over the Totalling field.
This is where you pick those G/L Accounts (Or whichever accounts you have chosen in the Totalling Type)
Here you can use dynamic filters so you may want to state 4000..4050
Or 4000|4030|4110
(Check out A Boardroom Mum’s post on Business Central Filters for assistance here)
Edit Column Definition
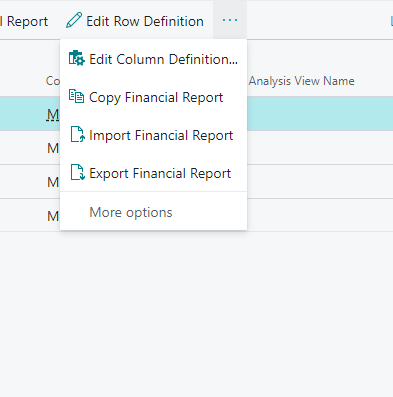
Is setting out how you want the financials to appear such as compare the balances with the same period last year or against the budget.
You can also set up percentages in here to be displayed such as Gross Profit Margin %.
Or be even more creative you could use statistical accounts to report percentages such as sales commission per number of staff in the sales team.
This post could go and on as there is so much to cover with creating financial reports in Business Central.
Hopefully this gives you a starting point.
For further insight see the link below.